In the DIY projects for personal care products and household repairs, we often overlook the little things that make a big difference. Have you ever grabbed a bottle of spray foam, ready to tackle that stubborn draft or unsightly crack, only to find yourself fumbling with the foam trigger spray, unsure of how to attach it properly? This tiny but essential tool can sometimes feel like it’s got an instruction manual written in hieroglyphics. But fear not, because unraveling this mystery is simpler than you might think, and mastering it can elevate your project from amateur mishap to professional success.
You’ve got your trusty can of spray foam in hand, but if the trigger isn’t attached correctly, you could end up with a sticky mess instead of a neat, efficient application. In this guide, we’ll walk you through the exact steps to attach the foam trigger spray with precision, ensuring a smooth operation every time. From aligning the nozzle to securing the trigger, you’ll gain the confidence and know-how to handle your projects effortlessly, giving you more time to enjoy the fruits of your labor rather than cleaning up after it. Get ready to transform how you approach your home improvement tasks with this simple yet crucial skill.

Understanding the Components of a Foam Trigger Spray
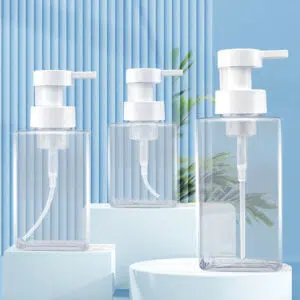
A foam trigger spray is a handy tool that allows for controlled and precise application of foam. Before we dive into the process of attaching it correctly, let’s take a moment to understand its components. The foam trigger spray consists of three main parts: the canister, the nozzle, and the trigger.The canister holds the foam and is typically made of sturdy plastic. It is designed to be compatible with various types of foam products, ensuring a seamless attachment. The nozzle, located at the top of the canister, controls the flow and direction of the foam. It is important to align it properly for optimal performance. Lastly, we have the trigger. This is what you press to release the foam from the canister through the nozzle.
Preparing the Spray Foam Canister for Attachment
Now that we have a basic understanding of how a foam trigger spray works let’s move on to preparing it for attachment. Start by ensuring that your canister is clean and free from any debris or residue from previous use. This will prevent any clogs or blockages during application.Next, shake your canister vigorously to mix up the contents inside. This will ensure that your foam is properly blended and ready for use. Remember to read and follow any specific instructions provided by the manufacturer regarding shaking or priming.
Aligning the Nozzle and Trigger for Optimal Performance
To attach your foam trigger spray correctly, you need to align both the nozzle and trigger with precision. Begin by locating the small groove or slot on top of your canister where you will attach these components.Take your nozzle and insert it into this groove until it fits snugly in place. Ensure that it is aligned straight without any tilting or wobbling. A secure fit will prevent leaks during application.Next, take your trigger and align it with its corresponding slot on top of the nozzle assembly. Gently push it down until you feel it click into place. This click indicates that the trigger is securely attached and ready for use.
Securing the Trigger in Place to Avoid Leaks
Once you have attached the trigger, it is important to secure it properly to avoid any potential leaks. Look for any locking mechanisms or tabs on your canister that are designed to hold the trigger in place.Engage these locking mechanisms by sliding or rotating them into position. This will ensure that the trigger remains securely attached throughout your project, providing a consistent flow of foam without any interruptions.
Testing the Attached Foam Trigger Spray for Functionality
With your foam trigger spray now attached and secured, it’s time to test its functionality. Point the nozzle away from yourself and any sensitive surfaces, then press the trigger gently.Observe how the foam is dispensed from the nozzle. It should come out smoothly and evenly without any sputtering or splattering. If you notice any irregularities, such as uneven flow or blockages, refer to the troubleshooting section later in this guide for solutions.
Troubleshooting Common Attachment Issues
While attaching a foam trigger spray is generally a straightforward process, there may be instances where you encounter some issues. Here are a few common problems and their solutions:1. Loose attachment: If your nozzle or trigger feels loose or wobbly after attaching, double-check if they are aligned correctly and securely inserted into their respective slots. Adjust as necessary until you achieve a snug fit.2. Leaks: If you notice any leaks around the nozzle or trigger area during testing, ensure that they are properly aligned and secured in place. Tighten any locking mechanisms if necessary.3. Clogs: In case of clogs or blockages during application, remove the foam canister from the attachment and clean both the nozzle and trigger thoroughly with warm water or an appropriate cleaning solution recommended by the manufacturer.
Proper Storage of Foam Trigger Spray for Future Use
After completing your project, it’s important to store your foam trigger spray correctly to maintain its functionality for future use. Start by removing the canister from the attachment and wiping off any excess foam from the nozzle and trigger.Store the canister in a cool, dry place away from direct sunlight or extreme temperatures. This will help preserve the quality of the foam and prevent any damage to the attachment components.
Benefits of Correctly Attaching a Foam Trigger Spray
Attaching a foam trigger spray correctly offers several benefits. Firstly, it ensures a smooth and controlled application of foam, allowing you to achieve precise results in your DIY projects. Secondly, it minimizes wastage by preventing leaks or uneven flow. Lastly, it enhances safety by reducing the risk of accidents or spills during application.
Enhancing DIY Projects with a Well-Attached Foam Trigger Spray
Now that you have mastered the art of attaching a foam trigger spray correctly, you can take your DIY projects to new heights. Whether you are sealing gaps, insulating surfaces, or creating crafts, this simple tool will make your tasks more efficient and professional-looking.
Conclusion: Enhancing Your DIY Experience with Proper Foam Trigger Spray Attachment
In conclusion, attaching a foam trigger spray correctly is an essential skill for anyone undertaking DIY projects involving foam applications. By understanding its components and following the step-by-step process outlined in this guide, you can ensure optimal performance and achieve outstanding results every time. So go ahead and confidently tackle those home improvement tasks with your well-attached foam trigger spray!
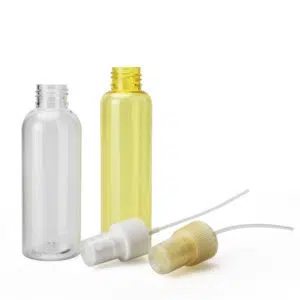
There are a wide rangs of trigger sprayer in cosmetic packaging in Betterchois workshop, which include foaming trigger spray bottle, PCR foaming trigger spray head, foaming trigger, fine mist sprayer, treatment pump, lotion pumps, plastic trigger sprayer, perfume sprayer, and so on.